The new Reduce Notifications Focus Mode

For iOS 18, Apple has introduced a new Focus Mode called Reduce Interruptions, which aims to use Apple Intelligence to prioritize notifications to cut them down, yet not have you miss anything important.
A strength of Apple Intelligence is that rather than some separate ChatGPT-like app, its features are woven into all aspects of the iPhone, iPad, and Mac. But that also makes it confusing when Apple promotes some feature but doesn’t say where it fits.
“For example,” said Craig Federighi at the WWDC 2024 launch, “your iPhone can prioritize your notifications to minimize unnecessary distractions while ensuring you don’t miss something important.”
Not to reduce the potential benefits of the Apple Intelligence feature called Reduce Interruptions, but it’s really just an extension of the existing Focus Modes feature. Apple introduced these in 2021, building on Do Not Disturb to offer a tailored way deciding who can interrupt you and when.
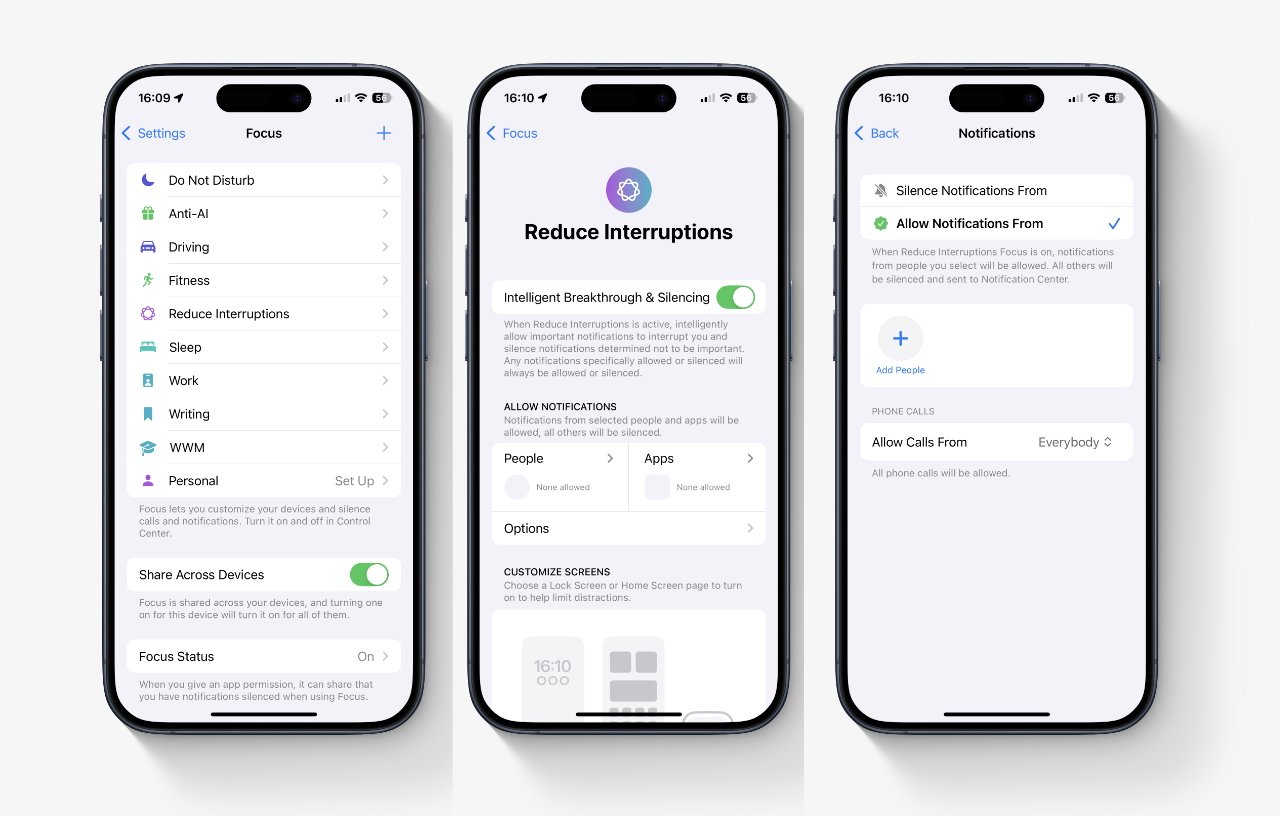
You control the new Reduce Interruptions in the same way you do any Focus Mode, and in theory, you set it up in the same place. Go to Settings, Focus Modes, and tap on the new Reduce Interruptions entry in the list.
What’s really new
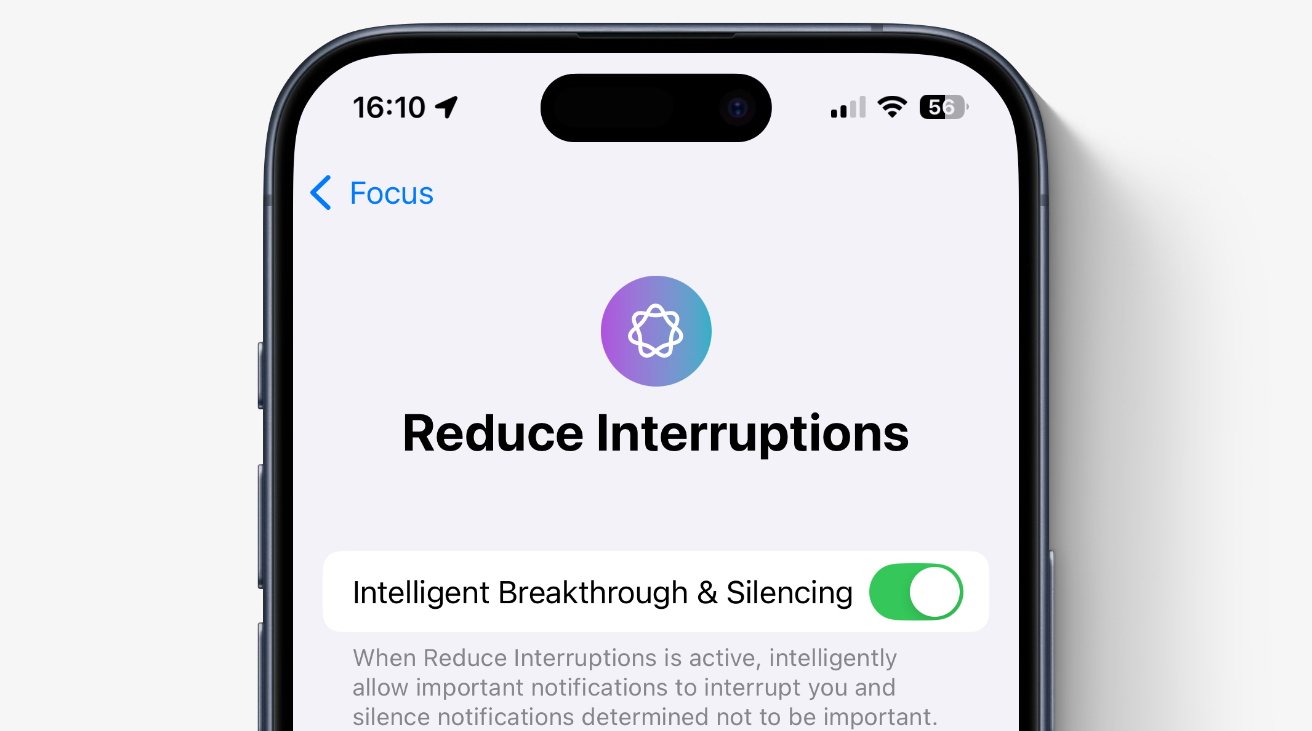
There is a difference between Reduce Interruptions and any other Focus Mode you set up. It’s specifically this: you can turn on an option called Intelligent Breakthrough & Silencing.
That option is there at the top of the Reduce Notifications Focus Mode. But it’s also at the top of every Focus Mode you have, or you now ever create.
So the majority of the features are in the Reduce Notifications Focus Mode, but this core one of Intelligent Breakthrough & Silencing has to be turned on separately in every Focus Mode you want.
Once this is turned on, Apple Intelligence will have do this prioritizing based on its interpretation of what’s urgent, and what is not.
There was already a system for having Siri decide when you switch on a Focus Mode. You could and can always turn on a Focus Mode manually through Control Center, and you could and can set a schedule for it, or you could ask Siri to handle things.
Siri would then turn that Focus Mode off or on depending on criteria such as what you normally do at a given time of the week. You were trusting Siri to get it right.

L-R: You get to Reduce Notifications just as you do any other Focus Mode, and it has the same options too
Now you’re trusting Apple Intelligence to go further and step in to push a notification only if it judges that it’s important.
That’s the scary thing about Siri turning, say, Do Not Disturb, on practically whenever it believes you need peace and quiet.
It’s scary because you can’t really predict what it will do. It can be as you’ll only know in retrospect whether Siri correctly gave you a productive morning, of it made you miss your dental visit.
Controlling Reduce Interruptions
As this is just another Focus Mode, you can control it in the same way you do any such modes. Specifically, you can set:
- What people can interrupt you
- What apps can interrupt
- What wallpaper you use
- What homescreen and lock screens you want
And so on. The result is that you may not be able to stop Siri’s algorithms working away, but you can make exceptions. You can make a whitelist of people and apps that you’re happy to be notified about.
Making people whitelists
- Go to Settings, Focus Made
- Tap a Focus Mode to enter
- Turn on Intelligent Breakthrough & Silencing
- In the next section tap on People
- Choose either Silence Notifications From, or Allow Notifications From
- Tap Add People
It’s probably best to choose Allow Notifications From instead of Silence. If you use Silence then you could have to go through your entire contacts list, painstakingly choosing yes or no for each one.
Whereas when you choose Allow Notifications From, you just tap on the few names you want to let interrupt you.
Making app whitelists
- Where you chose People before, now tap Apps
- Choose either Silence Notifications From, or Allow Notifications From
- Tap Add Apps
Now you have it set so that the Weather app, for instance, doesn’t pester you with news about light raining starting in half an hour. There are many more fine-tuning options, including ones such as turning off notification badges.
When you do that, you know there are unread messages or tasks that you have yet to do, but not seeing red badges with a high count in them is more relaxing.
You’re in control
It’s up to you when you block a person or an app, and it’s also up to you whether that’s permanent or schedule. What’s not up to you is how Apple Intelligence works behind the scenes.
You can guess some of it. For instance, an email that says something about your PTA meeting today is going to get bumped up the priority list specifically because it includes today’s date.
But what you can also do with these options about whitelisting people apps is say no. You don’t want Apple Intelligence to show you notifications from this one man and those ten apps.
You can also go down a true rabbit hole in fine-tuning the options, so that you allow interruptions from Instagram on Fridays, but not text messages during your exam on Monday. You can set Focus Filters so that, for instance, your email inbox doesn’t show you how many unread messages there are.
Maybe in the end, this is what Apple Intelligence and its Reduce Interruptions is really bringing us. Yes, peace of mind when we need to concentrate, but also peace of mind knowing we don’t have to go through so many options to get rid of interruptions.


