
Property lists are essentially XML files with a .plist extension. Here’s how to edit them using the command line in the macOS Terminal app.
XML is an open data format which gained popularity in the mid-1990’s when the internet first became commercialized. It’s a text-based format which uses key/value pairs to store data. Keys provide data labels, and values store the data related to each key.
Data types in XML include Booleans (true/false), numbers, dates, strings (text), arrays, dictionaries, and plain data. A dictionary is just a bundled table of values also with its own set of keys – one for each data item.
By combining and embedding these data types in an XML file, you can store a variety of nested data for just about anything. While XML is usually stored as plain text, it has also become one standard for information data interchange across the internet – although today it has been superseded mostly by JSON (Javascript Object Notation), which is somewhat similar.
XML on Apple platforms
When the first version of Mac OS X shipped in 2000, Apple made it clear it was adopting XML as a file format for much of the Mac operating system. Apple uses a native file format called Property Lists (.plist) which is plain XML with some custom Apple XML header info at the top of each file.
You may have seen .plist files in your macOS Preferences folders in /Library/Preferences, or ~/Library/Preferences. These are simple XML files containing lists of XML data which can be read by apps or macOS itself to store preferences.
For example, the macOS Finder’s settings file lives in the Preferences folder and is named com.apple.Finder.plist. Most .plist settings files use this form of reverse DNS notation: the second component in the file name identifies the company that makes the software, then the app’s name, then the .plist extension.
You can open a .plist file in Apple’s TextEdit app to read it as raw text, or you can open it in Apple’s developer IDE, Xcode – or in most any other plain-text editor app.
Xcode has a special formatting feature that displays a .plist file as a table editor with each type of data in a row containing the type of data, and its key. By clicking a popup menu next to each item in the table you can change its type to any known formatted kind.
.plist data of generic, unknown, or opaque types are treated as a data blob – or in the case of Apple platform programming a data type of Data (in Swift), or NSData in Objective-C.
Apps also bundle .plist files inside on macOS, iOS, iPadOS, and watchOS to both describe apps and to store content. The Info.plist file, for example describes each app and its capabilities to the operating system.
There are system APIs in Apple’s operating systems to transform and serialize XML and .plists to and from other data formats.
Editing property lists
As mentioned, you can edit .plist files directly by opening them in either a plain text editor, or in Xcode.
If you open a .plist file in TextEdit for example, you’ll see unformatted XML with tags. To change a .plist file’s data in a text editor you’ll need to understand XML tags and how they work. XML tags are very similar to HTML tags.
In Xcode you can simply open a .plist file, or add it to an Xcode project window and then single-click it in the Project Navigator on the left. This displays the .plist’s contents in the pane on the right:
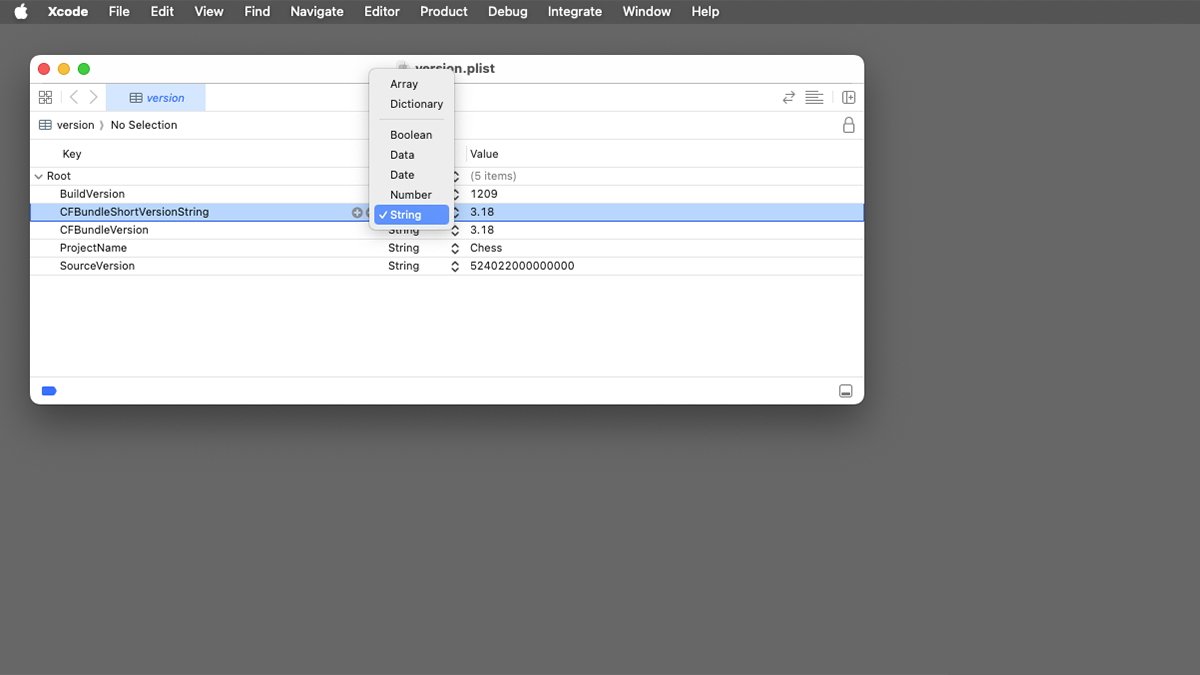
Editing a .plist file in Apple’s Xcode.
The above window shows the version.plist file for Apple’s Chess app: each row is one data item, keys for each item are listed in the left column, each data type is shown in the center column, and each key’s value in the column on the right.
To change a .plist file’s data in Xcode either single-click on one row’s data or key and type in new info, or click the small popup menu in the center column in the row to change its type. In the popup menu only known, allowable .plist data types are listed.
Once you’ve made all the changes you want, simply File->Save the .plist file (or press Command-S on your keyboard).
One huge advantage to XML is you can edit the files on any platform, save them, then copy them between computers without having to convert them. Software localization is often done this way – with strings of text stored in .strings files for translation between languages. Strings files also contain standard XML using key/value pairs.
InfoPlist.strings files bundled inside apps contain localized versions of strings found in the descriptive info for identifying an app. This is the text that appears, for example when you do a File->Get Info on an app in the Finder.
More recently a version.plist file bundled inside each app may contain the app’s versioning info stored in XML format using Apple keys such as CFBundleVersion and CFBundleShortVersionString .
Apple has a section in the developer documentation discussing info property lists.
The “CF” prefix in Apple .plist keys represents Core Foundation – a C-based API used to manipulate base data types and .plists on Apple platforms.
Strings files in Apple platform development
In Apple development, strings are often stored in a .strings file or a strings table for localization. Developers can outsource their strings files for localization to translation companies so they don’t have do the translation.
If you look inside an app’s bundle (folder) you may see several .strings files stored in language folders, with each folder ending in “.lproj” and with an ISO-standard two-character prefix for the country name. By duplicating and changing the contents of each version of strings files, developers can add new languages to app interfaces without having to know the languages.
macOS and iOS are smart enough to load the correct localized strings file or table for the current language in use on an Apple device.
By using separate strings and .plist files, the user interface of an app can be changed at runtime or later – without having to compile the text into the app’s binary code. This is known as Dynamic Loading.
This is why you’re able to change the system language in Settings on an Apple device and have the same app update its UI text for the new language selected. In older operating systems vendors had to ship separate language-specific versions of an app for each country or language.
Dynamic Loading also reduces an app’s memory footprint at runtime since strings aren’t loaded into memory until they’re actually used.
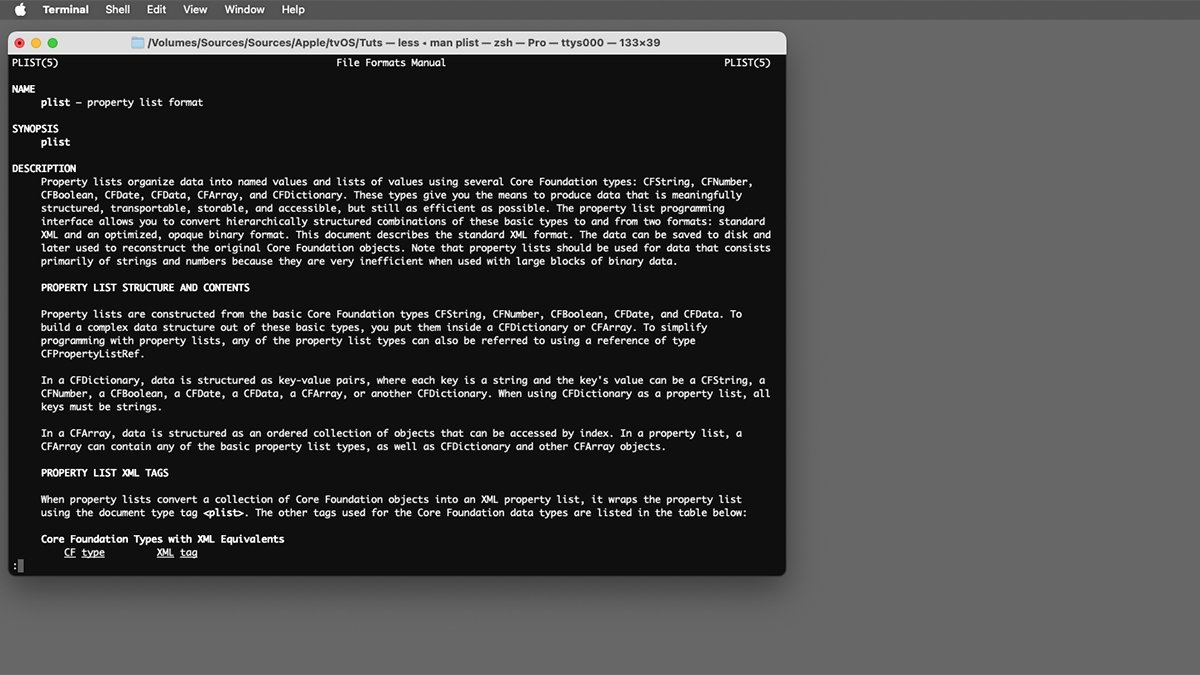
You can learn more about .plist formats and CF types in Terminal by typing “man plist”.
Editing property lists in Terminal
macOS includes a (UNIX) Terminal (shell) app which allows you to issue commands at the command line to perform actions. One of the most powerful uses of Terminal is batch processing and writing scripts to automate processes.
Many Terminal commands include an -r (recursive) flag to tell the command to continue processing all files it finds in a given folder no matter how deeply nested those files may be.
You can use Terminal to both manually and automatically process .plist and .strings files for faster editing.
This can save time, for example if you have a batch of files for multiple languages and want to replace all their values with new localized text from language tables or some other inputs. Or you might want to change all keys for a certain item in a batch of files at once without having to edit each file manually.
We won’t get into shell scripting automation in this article but there are many good books and online tutorials for writing shell scripts for batch processing.
OS X used to come in boxes
Editing a property list in Terminal manually
To edit a .plist file in Terminal, use the built-in defaults command. defaults allows you to both edit and view .plist files, as well as set system settings for known operating system .plist files using names.
For complete usage of the defaults commands, in Terminal type:
man defaults and press Return on your keyboard.
To exit the man system in Terminal press Control-Z.
The main option to defaults to change a value in an existing .plist file is the write option followed by the new data to be written.
As the man page mentions, the new data must be in a specific format (usually another .plist or dictionary) and must contain the keys and values to be written. The format of this data has to be exact or else the command may fail or the file’s data might become corrupted.
For example the man page demonstrates changing an array in a .plist which has a name of “Default Color” to a new value of (255,0,0). To do this you’d use the command:
defaults write com.companyname.appname “Default Color” ‘(255, 0, 0)’
Where “appname” is the name of the app for company “companyname”.
You can also overwrite existing values in a .plist with another .plist. For example:
defaults write com.companyname.appname ‘{ “Default Color” = (255, 0, 0); “Default Font” = Helvetica; }’;
In this example the new .plist data is enclosed in curly braces, and contains two key/value pairs: “Default Color” and “Default Font”.
Be careful when writing to existing settings files because if you corrupt the data in a .plist file used by macOS, your Mac may stop working correctly.
There are also delete options for defaults, but be aware delete is even more dangerous than the write option. Some of the delete options destroy data – and can even delete all data in a domain with a single command.
You can print a list of all domains on your Mac by using the domains option:

You can learn more about .plist formats in Terminal by typing “man plist”.
Editing a property list file outside a settings domain
To edit any arbitrary .plist file located at any writable location in the filesystem, use the filepath option. This allows you to edit a .plist in the same way you did above for settings files, but for any .plist file at any given path. filepath also works with the read command.
defaults read ~/Library/Containers/com.apple.TextEdit/Data/Library/Preferences/com.apple.TextEdit.plist
reads the TextEdit app settings file located in the user’s Library folder.
But the filepath option works for any .plist file – not just for settings files or files belonging to apps.
By writing and combining defaults commands into an automated script file, you can see how easy it would be to batch process .plist files without too much effort.
In fact, much third-party Apple Software is built this way: usually a build engineer writes automation scripts to retrieve a codebase from a server, batch process localized .plist and strings files, then run builds on all software components. Builds are usually then post-processed using another set of scripting files to assemble the final software for release.
The defaults command also has options for adding or replacing specific types of data to a .plist file.
The defaults system has been around in macOS, Mac OS X, and iOS for decades and in fact was one of the original technologies used in NeXTStep – the precursor to most of Apple’s operating systems today.
Once you master the defaults system you’ll find yourself using it a lot to inspect and change macOS settings and to edit .plist files. Just be sure you’re comfortable and confident doing so before you use it.
Apple has a short section in the Terminal User Guide which describes how to use the defaults system to edit .plist files and settings.
If you use a Windows computer, check out the really cool XML editing tools made by Altova.


