
If you are a developer, or just curious about what the next version of macOS will be like to use, you may have been running the the beta of macOS Sequoia on your Mac. But what do you do when you no longer want to run the beta?
If the beta is causing havoc with your Mac, you are fed up with having to set aside time each week while the latest update is installed, or you just want to go back to the way things were then it’s time to remove the macOS beta and go back to Sonoma. Unfortunately, it isn’t as easy as you may think. Luckily we explain what you need to do below.
Once Apple releases macOS Sequoia later in 2024, reverting to the full version of Sequoia will be a lot easier, but we’ll run through how to do that below as well.
We’ll run through the complex process for reverting from the macOS Sequoia beta to macOS Sonoma, before running through the simpler process for reverting from the macOS Sequoia beta to the full macOS Sequoia once it launches.
If it’s the iOS beta program you wish to leave read: How to remove an iOS beta from your iPhone
How to revert from macOS Sequoia beta to Sonoma
If you are running the beta of macOS Sequoia and want to downgrade back to Sonoma, try the following steps:
You will need to wipe your Mac first. You won’t be able to install Sonoma over the top of Sequoia, unfortunately. This is why we always recommend making a backup before you install a beta, or any newer version of macOS.
1.
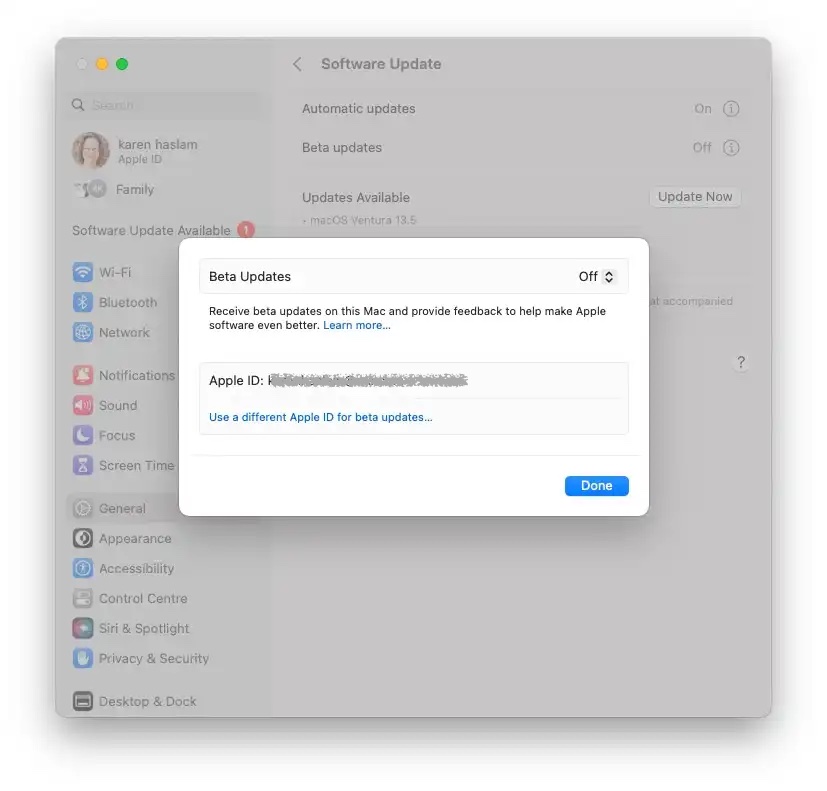
Leave the beta program
Foundry
The first thing to do is remove yourself from Apple’s macOS Sequoia beta program as this will stop the beta updates from arriving on your Mac.
- Open System Settings.
- Click on General.
- Click on Software Update.
- Click the i beside Beta updates and make sure it is set to off.
This will stop any further Sequoia updates being installed on your Mac, but if you want to revert back to Ventura you will need to wipe your Mac, as per the instructions below.
2.
Wipe your Mac

Foundry
Unfortunately, if you are moving from macOS Sequoia back to Sonoma you will need to erase all the data from your Mac first. You cannot install Sonoma on top of Sequoia.
Luckily there is an Erase All Content and Settings option in System Settings that makes it easy to return your Mac to factory settings.
To find the Erase All Content and Settings option open System Settings > General > click on Reset > click Erase All Contents and Settings.
Once you click on Erase All Content and Settings everything will be taken care of. We run through the process in more detail here: How to factory reset a MacBook or Mac.
Just note that during the process any Bluetooth keyboards or mice will be disconnected, so if you have wired options they will be helpful. If you don’t have a wired mouse or keyboard you should get an option to connect your Bluetooth peripherals when the Mac restarts.
If your Mac doesn’t have an M-series chip or a T2 chip the process to wipe it is a bit different (and described in the story linked to above).
3.
Reinstall macOS

Foundry
Once your Mac has been wiped and reset to factory settings it should restart running the latest full version of macOS that is compatible with your Mac.
You will need to join your Wi-Fi network and connect your mouse and keyboard if they are Bluetooth.
Eventually, you will eventually see an Activate Mac screen. Click on Restart.
On restarting your Mac will guide you through steps to set it up as if it was the first time.
4.
Recover your Mac via Time Machine
Foundry
After your content and setting have been removed from your Mac you can either set it up as new, or you can recover a Time Machine backup with your data from before your beta adventure.
This backup has to be from before you installed the beta or you will just reinstall the beta.
If you have wiped your Mac and are setting it up as new, recovering your old settings and data via a Time Machine backup is really easy.
- During the setup process you will be asked if you have a Time Machine backup. Just say yes.
- Plug in your backup drive and leave the Mac as it recovers the data from the Time Machine backup.
- Once it has done that your Mac will be as close to what it was before you installed the beta.
Alternatively, if you decide to recover your Time Machine backup later on, you can do so using macOS Recovery.
- Plug in the hard drive on which your Time Machine backup is located.
- Restart your Mac.
- If you have an M1-Series Mac you need to press and hold the power button until you see the Loading startup options screen at which point click on Options and then Continue. See How to start a Mac in Recovery mode. (On an Intel-powered Mac hold down Command + R until the Apple logo appears.)
- Now you are in macOS Recovery, you’ll see the option to Restore from your Time Machine Backup. Select that and click Continue.
- Choose your Backup source and click on Continue again.
- Choose the correct backup – the last one from before you installed the beta. (You can check this by looking at the macOS version column).
We have a guide to restoring from Time Machine here.
5.
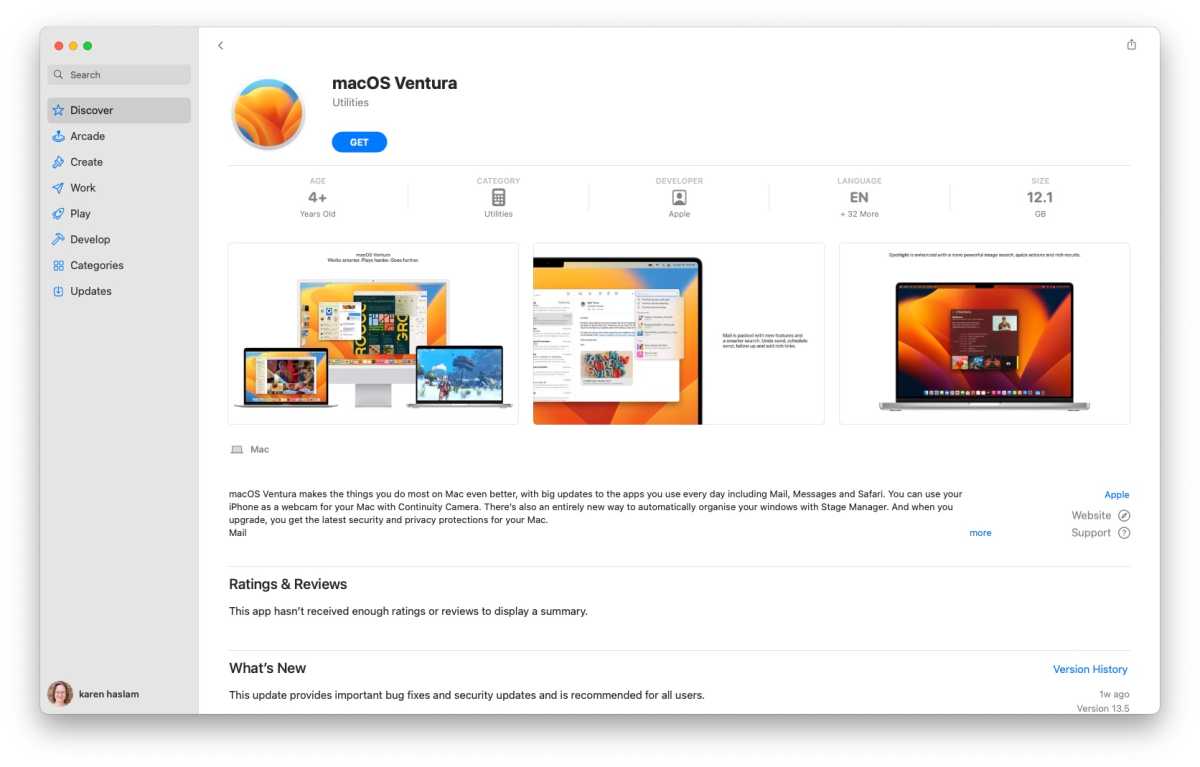
What to do if your Mac won’t download Sonoma
Foundry
If you find that Sonoma isn’t available to download via Software Update–perhaps because your Mac erroneously believes it’s already running the software–you can trick your Mac into downloading the full version of the software and installing it by using the Mac App Store.
- Open the Mac App Store.
- Click here for Sonoma.
- Click on Get and your Mac will offer to download the installers.
- The Software Update window from System Settings/System Preferences will open. Confirm that you want to download the software, you’ll also see a warning that you are downloading an older version of the OS, ignore it.
- Wait while the macOS downloads – it may take a while, and if your internet connection drops you might have to start again.
- Once it’s downloaded click on Open and wait while it installs. Expect this to take a while…
You may see a message that the software is already installed. Just confirm that you do want to go ahead with the download and once you have the installer you will be able to install the final version over the beta.
How to revert to an old macOS using Recovery
It may also be possible to download and install an older OS using the built-in Recovery mode. But it depends on what version you are reverting to. We run through how to do this here: How to reinstall macOS using Recovery Mode.
Here’s how to reinstall the most recent compatible version of macOS on your Mac using Recovery:
- Restart your Mac.
- On an M1/M2-Series Mac you need to press and hold the power button until you see the Loading startup options screen at which point click on Options and then Continue. On an Intel-powered Mac hold down Option + Command + R until the Apple logo appears. See How to start a Mac in Recovery mode.
- You’ll see the option Reinstall macOS. Click on this and Recovery will install the most recent version of macOS that is compatible with your Mac.
Alternatively, if you don’t want to go back to Sonoma, press Shift + Option + Command + R (on an Intel Mac) to reinstall the version of macOS that was installed on your Mac when you purchased it.
How to stop getting the macOS Sequoia beta
If you are still running the macOS Sequoia beta and want to install the new version of macOS Sequoia when it launches, the process to revert to the full version is relatively simple.
The first thing to do is remove yourself from Apple’s macOS beta program as this will stop the beta updates from arriving on your Mac.
- Open System Settings.
- Click on General.
- Click on Software Update.
- Click the i beside Beta updates and make sure it is set to off.
Now that you have left the Beta program the next version of macOS that is offered to you via System Settings will be a full version of macOS and you will be able to install that as usual.
It’s slightly more complicated if you are running a newer version of the beta than the official version. In that case, you can either wait for Apple to issue the next macOS Sonoma update and install that instead, or you can follow the steps below to revert to an older version of macOS.
If you don’t want to wait for that next update then you can install macOS Sequoia using macOS Recovery.
- To enter Recovery mode press and hold the power button while your Mac starts up and continue to press and hold the button until you see a startup options window appear with an Options icon. (On an older Mac you enter Recovery by pressing the Command and R buttons during start-up).
- Select Options and click Continue.
- macOS Utilities will open with the option to Reinstall macOS [version]. Select that option.
- Enter your password if required.
- Wait while installation takes place (don’t let the Mac go to sleep).
You may need to erase your disk, in which case you will want to make sure that important documents are backed up (not in Time Machine as that will also copy the version of macOS you are running).
If this doesn’t work for you, do a clean install following the steps above.
We have more advice about installing macOS on your Mac here and here’s what to do if you encounter problems installing macOS.


