
When using a Mac, often multiple apps and windows are open at once. This can make it tricky to find the app or window you need–when you’re humming along working, sifting through windows and apps is a jarring hiccup.
With macOS Sequoia, Apple provides a new window tiling function to help you find an app or window. The feature takes its cues from third-party utilities that add the functionality to macOS–Sequoia’s window tiling isn’t as robust as those apps, but it’s still very useful. (If you’re already using such an app, you may want to stick with it.)
Learn more about the next Mac operating system in our macOS Sequoia superguide. Here’s how window tiling in macOS Sequoia works.
- Tools required: macOS Sequoia
1.
Check macOS Sequoia’s Desktop & Dock settings
Foundry
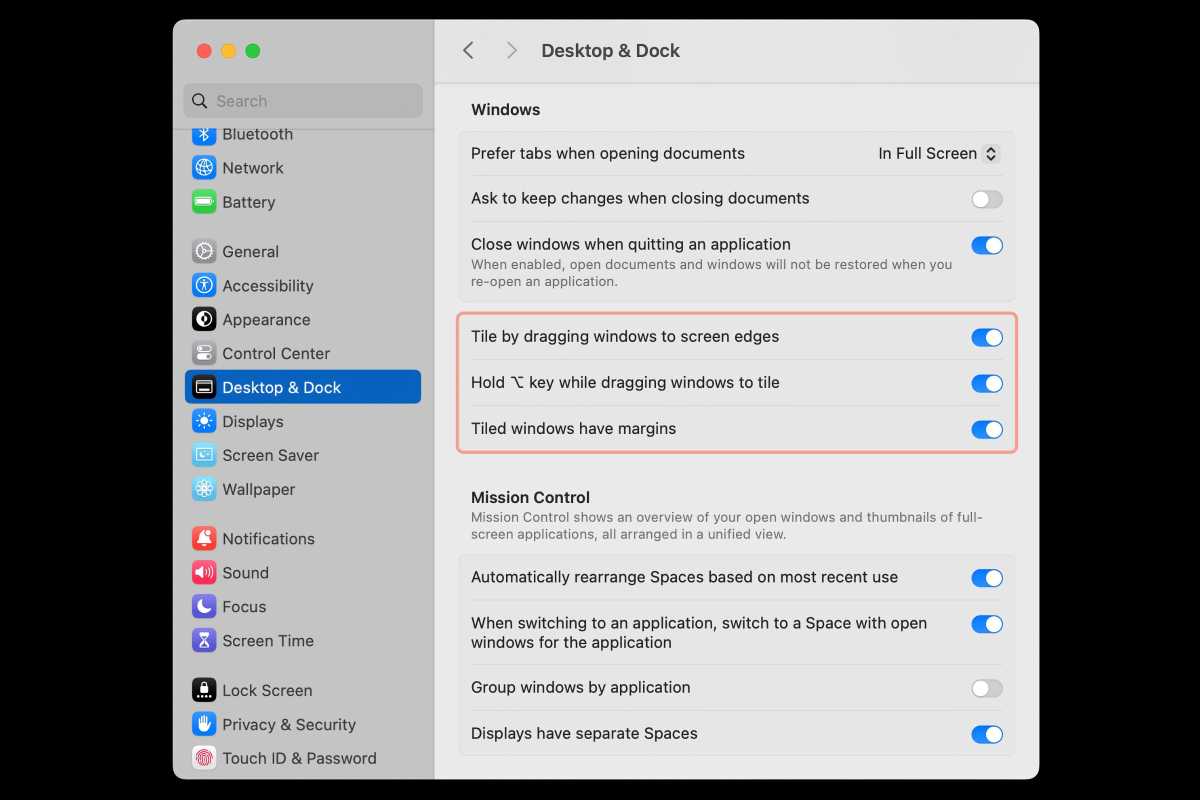
While the new window tiling feature is on by default, you can check to make sure the setting is on. Go to System Settings > Desktop & Dock and then scroll down to the Windows section.
Apple has three new settings for window tiling:
- Tile by dragging windows to screen edges: turn this on if you want to place window tiles by dragging on the screen. There are other ways to tile windows if you turn this off. I’ll detail how this works in the following steps.
- Hold the ⌥ [Option] key while dragging windows to tile: turn this on if you don’t want to drag the window all the way to the spot to place it.
- Tiled windows have margins: With this one, a bit of space is inserted between the windows.
Once you’ve adjusted the settings, close System Settings.
2.
First way to organize windows: Drag and place
Foundry
One way to place a window is to click and drag it to a spot on the screen. If you drag a window to a spot, an outline appears to indicate where the window will be placed. Let go of the window to place it.
Here are the spots on the screen where to drag windows:
- Left or right side of the screen: places the window of the half of the screen to which you drag.
- Top of the screen: places the window either in the center of the screen, or it centers it and fills the screen but it’s not full-screen mode. Don’t drag past the top of the screen because this opens Mission Control.
- Corners: Places the window in a quarter of the screen. This spot can be a little tricky to locate because it’s the very corner of the screen.
While dragging a window, the cursor needs to reach the spot on the screen to trigger the placement. Make it easier on yourself by clicking and holding the window in a location close to the spot where you want to drag to.
If you decide to turn this off (see step 1), there are other ways another to tile windows. Go to step 3.
3.
Second way to organize windows: Hold Option and place
Foundry
When you turn this on in settings, you can click and hold the window, then hold down the Option key, and then move to the left or right to place a window in a half-screen layout–you don’t have to drag the window all the way to the edge of the display.
However, you still must drag the window all the way to the corner if you want to do a four-window layout or drag to the top for a center-screen placement.
4.
Third way to organize windows: The green button
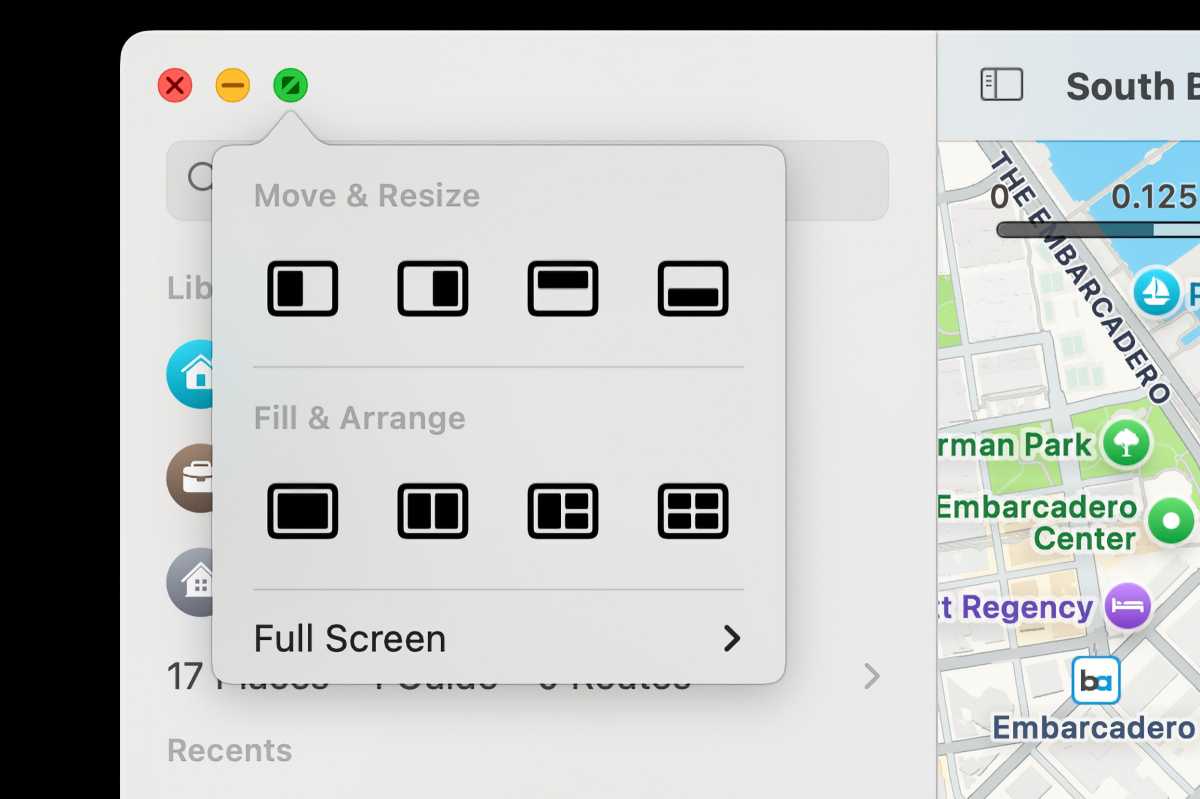
Foundry
The quick and easy way to place a bunch of windows is to use the green button at the upper left of every window. Hover over it (don’t click it) with the cursor and window tiling option pop-up. Select a layout and your windows are automatically placed.
5.
Using macOS Sequoia windows tiling
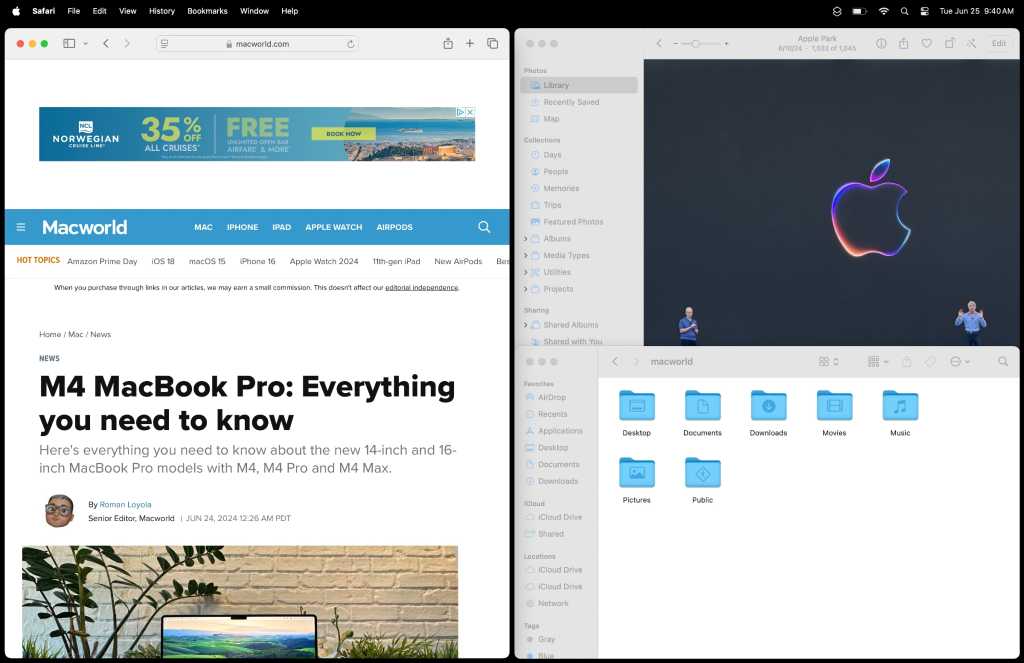
The screen here is set to 1440-by-932 on a 15-inch MacBook Air. As you can see, this four-window layout has a lot of overlapping windows.
Foundry
Here are a few things you should know about using Sequoia’s windows tiling:
- The maximum layout has four windows. If you have more than four, Sequoia places windows underneath the four on top.
- You can switch between one-, two-, three-, and four-window layouts using the green button pop-up. Windows will stack if you have more windows than the layout you choose.
- You can adjust the window size after it has been placed, but you can’t adjust the window sizes in the layout templates.
- Sometimes a developer has set certain window sizes for its apps, so that app may not fit in a placement properly. For example, Apple has set its News app at a minimum height so that it’s taller than the space set for a four-windows layout.
- Windows tiling doesn’t really work with screen resolutions lower than the default (see the screenshot above).
- Sequoia windows tiling does work on multiple displays.

